This is a full stack application that scrapes article headlines and snippets from Hypepotamus and allows users to save and delete comments on the articles.
The application uses Bootstrap for the user interface. Immediately upon launch, the application uses axios and cheerio to scrape the headlines, hyperlinks, and snippets (if available) from Hypepotamus. The application then checks each of these against the database to see if they have been previously saved, and if so, display the previously saved version with any available comments. If the article has not been previously saved, the application will display the new article to the user. Views are server-side rendered with the help of handlebars. Express handles routing and mongoose models the data as an ODM for MongoDB.
In order for this application to run on your local computer, you must have Node.js installed as well as the required node modules and a MongoDB database and server.
These instructions will get you a copy of the project up and running on your local machine for development and testing purposes.
Node.js, MongoDB, and express, cheerio, axios, mongoose, and express-handlebars packages are required to run this application locally.
- Clone this repo to your local machine using
https://github.com/dayadam/news-scraper.git
-
Go to the MongoDB download page: MongoDB Download Center
-
Scroll down, go to the green box with the Community Server Tab highlighted.
-
Go to the dropdown menu labeled "Version." Select "Windows 64-bit x64," then click the "DOWNLOAD (msi)" button.
-
The next page will thank you for downloading MongoDB then show a newsletter link. You can ignore this. In a few seconds, your browser will notify you that the file is downloading.
-
Open up Windows Explorer and locate the installation file (it should be in the default directory where your browser stores downloads). Open the file and follow the instructions.
-
When the installer prompts you to "Choose Setup Type," click the Complete button, then carry on.
-
DO NOT Install
Compassalong with your MongoDB install. -
A window might pop up mid-installation, asking you whether you’re sure you want to download a particular component of MongoDB. Click yes, otherwise the install will fail.
-
IMPORTANT: You need to create a data directory for your MongoDB installation, or it won't run. Open Git Bash, then cd your way to the root directory:
-
cd c: -
Run the following command:
-
mkdir -p data/db -
This is the default location for MongoDB’s databases. You need a directory for your databases, or else you MongoDB will refuse to run.
-
You’ll also want to add MongoDB’s path to the PATH environment variable, so that you can run it easily from the bash command line.
-
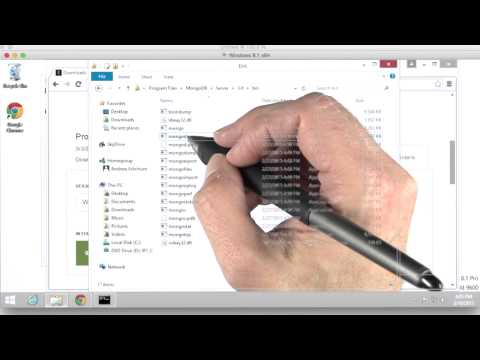
First, locate the directory where you installed MongoDB. This is likely
C:\\Program Files\\MongoDB\\Server\\<version_number>\\bin. Copy this directory to your clipboard. -
Then, open up the System menu or Control Card on your machine, usually accessible via the Start menu or Search Bar in Windows operating systems.
-
Go to Advanced Settings.
- If you are on Windows 10 and opened the Control Panel, click System and Security; System; and Advanced System Settings.
-
When a new window opens up, click the Environment Variables button located toward the bottom of the window.
-
An Environment Variables window should open up. Look at the bottom half of this window, a scrollable table called "System Variables." Look at the Variable column and search for the variable called Path. Click on it, then click the "Edit…" button below.
-
The next window will look different depending on your version of Windows. You’ll either be able to press the "New" button and paste your MongoDB directory into the input box that shows up, or you’ll have to paste the directory at the end of a long string of other directories. So it goes.
-
If you would prefer video instructions for this part, watch this:
-
Test if it worked: Close your current Git Bash window, then reopen it and run this command:
mongod -
NOTE: No "b" at the end, simply
mongod -
If mongod is still running, great job! Now go ahead and open a new instace of Git Bash, and enter the command:
mongo. This will initialize the Mongo Shell and allow you to begin entering commands via the Mongo Shell. Congratulations, you’ve installed MongoDB. -
If mongod didn’t run, and instead your bash threw a "command not found" error, make sure you added MongoDB’s bin directory to your PATH variable (see step B.3). Then, close out git bash and try running mongod again.
-
If mongod starts but closes after a series of prompts, make sure you created the data/db directory in your root. MongoDB cannot run without this directory (see steps 2.1-2.2).
-
Run the following command in terminal:
-
brew install mongodb
-
IMPORTANT: You need to create a data directory for your MongoDB installation, or it will not work.
-
Use the following exact commands (see note below if you want to know what these do):
-
sudo mkdir -p /data/db -
sudo chown -R $USER /data/db -
sudo chmod go+w /data/db
-
-
With the data/db directory made, you're ready to run MongoDB. Enter this command in your terminal window:
mongod -
NOTE: No "b" at the end, simply
mongod -
If mongod didn’t exit from your window, great job! You’ve installed MongoDB.
-
If mongod starts but closes after a series of prompts, make sure you created the data/db directory in your root directory, MongoDB cannot run without this directory (see steps 4.1-4.2).
-
If you do not want to use homebrew, you can alternatively follow these instructions: https://docs.mongodb.com/v3.0/tutorial/install-mongodb-on-os-x/. However, installing MongoDB without homebrew can be a bit of a headache. Installing homebrew on your mac will make your life as a web developer a ton easier.
The commands in #2 create a directory with administrative privileges, make your account the owner of that directory (instead of the "root" account owning it), and add write permissions to that directory so the apps you write are able to update your database
- install Node.js from https://nodejs.org/en/
install npm packages
$ npm installUsers can enter their name and comment in those respective fields on an article and click the "Submit" button to save it to the database and display it. Clicking the "Delete" button besides an existing comment will remove it from the database and remove it from the user interface. The article headlines are hyperlinks to the Hypepotamus article itself.
- Node.js - Server runtime environment for JavaScript
- Express.js - Fast, unopinionated, minimalist web framework for node.
- Mongoose - MongoDB object modeling tool designed to work in an asynchronous environment
- jQuery - Fast, small, and feature-rich JavaScript library
- Bootstrap - CSS framework directed at responsive, mobile-first front-end web development
- MongoDB - General purpose, document-based, distributed database
- Axios - Package used for server side http requests to APIs
- Express Handlebars - A Handlebars view engine for Express
- Cheerio - Fast, flexible & lean implementation of core jQuery designed specifically for the server.
- Adam Day - Adam Day
- Thanks to all the open source contributors that helped with the building blocks of this project.